Planning a VR event
Choosing your environment
The first thing to consider is what type of event you’re hosting, whether it’s a tutorial, poster session, social event, etc., and how many participants there are likely to be. This will impact the type of environment you want to use – you have a lot to choose from!
For larger events you may want to choose somewhere more spacious. For tutorials smaller spaces work well as they help keep people together. Also, bear in mind that larger spaces may not work so well for participants joining on mobile devices. For poster sessions you may want lots of flat wall spaces to display your posters.
Note: If you enter the room as a Guest or Member, you will not be able to change the environment or see the range of available environments. Please talk to a member of the VR Team if you want to change the environment.
To choose an environment –
Open settings (see below):
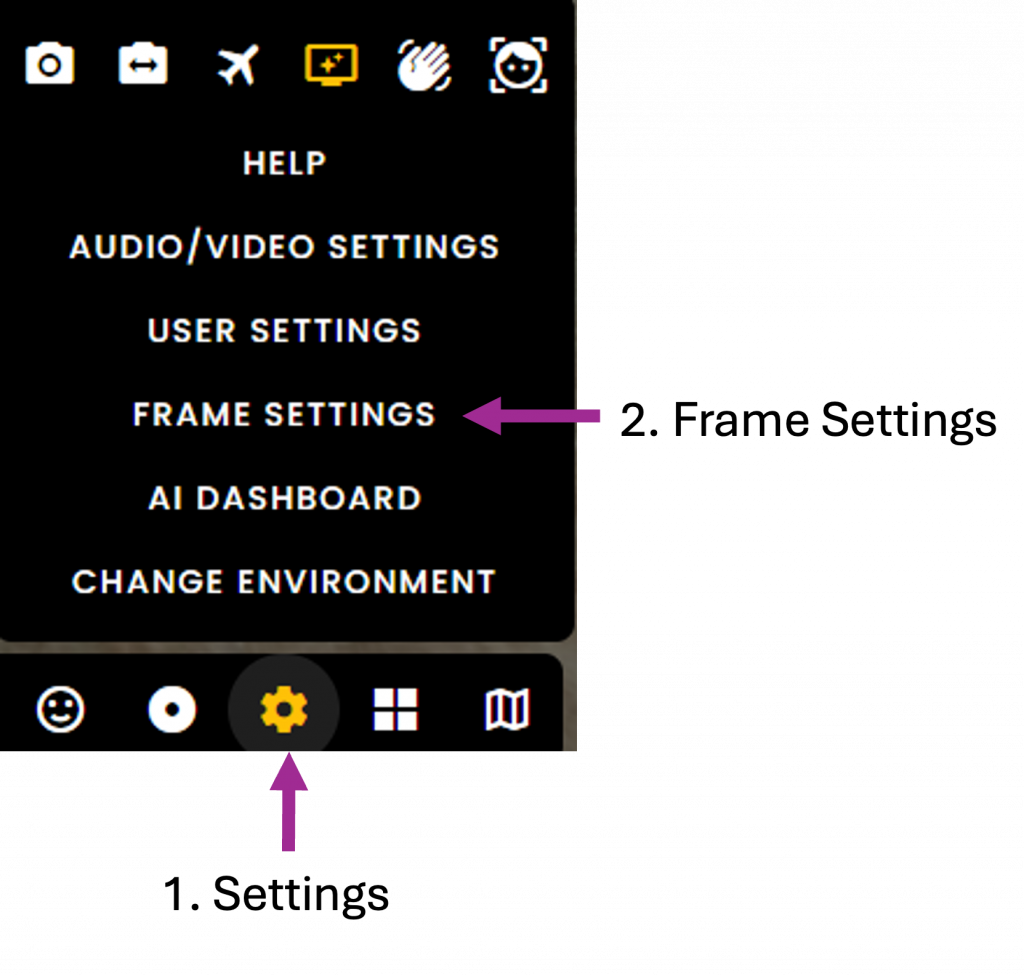
· Click Frame Settings
· Click environment
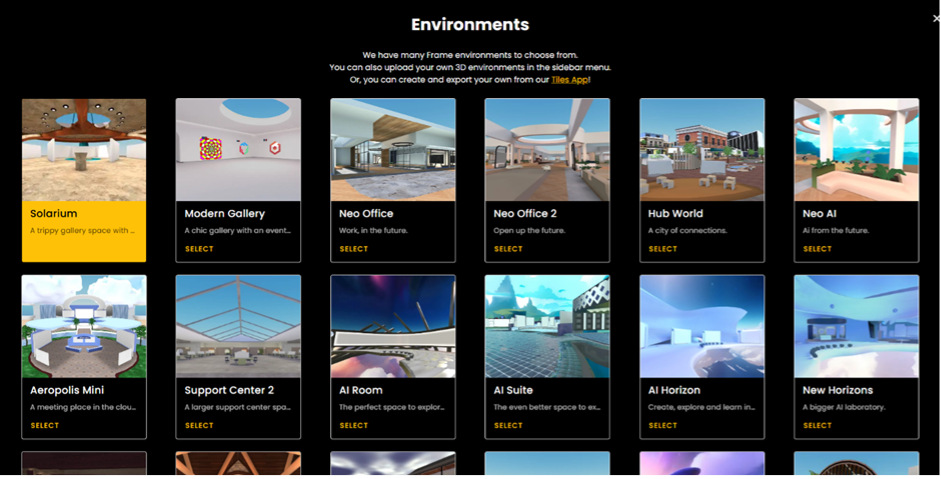
· Then chose the environment you want to explore by clicking on it!
A selection of environments are shown below.
Note: If you change your environment, any assets in your previous environment will appear in the same place in your new environment.
Adding resources
Once you’ve decided on an environment, it’s a good idea to consider what resources you need for your event. As you’re in a VR space, we recommend avoiding lengthy PowerPoint presentations or text-heavy resources as these might well work better in Adobe Connect. You can, however, use a slide or two for instructions.
Please note, you can’t use PowerPoint directly in Frame but you can convert PowerPoint files into PDFs. Alternatively, you can upload images (e.g., .png or .jpeg files). Information on how to upload files is given in the ‘Guide for learning event facilitators’ page.
For poster presentations, minimise the content on an individual poster as the resolution of very small text is too poor to be clearly visible. You are better to use a large clear font with a bold diagram and have multiple posters if needed rather than try to include everything on one. For poster presentations you may also want to recommend participants use ‘Flat mode’.
3D models are really fun to use and can also be set to rotate in Frame. Consider what 3D models you might want to include ahead of time. There is a collection of models that have been used in other sessions available in the 3D models repository, which you’re welcome to reuse.
Please note, 3D models ideally need to be in a .glb file format (although some other file formats are acceptable). You can search for alternate models from the following sites. Some are free, although many are only available to buy. Please do check the available file formats before purchasing to make sure they are compatible with Frame.
· Fab
· Meshy AI
You can also search for 3D models within Frame. If you click on Library, you’ll see a bank of resources grouped under different themes. These can be uploaded directly into your environment at no additional cost.
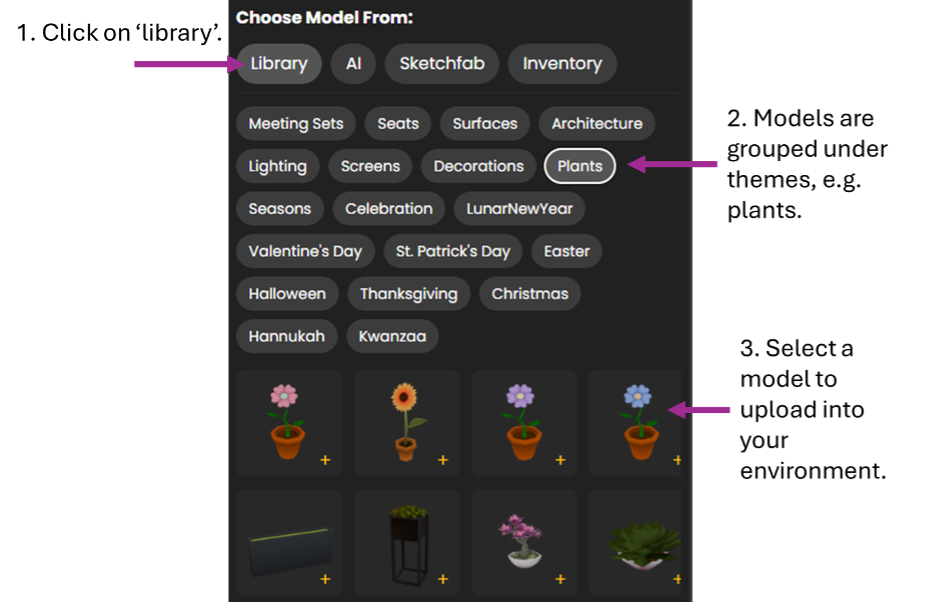
Frame also has the facility to use AI to generate simple 3D models at no additional cost (see below).
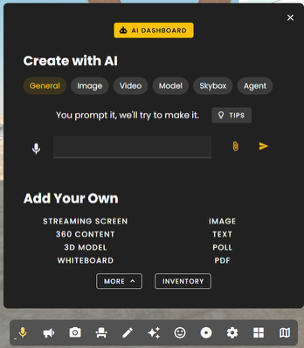
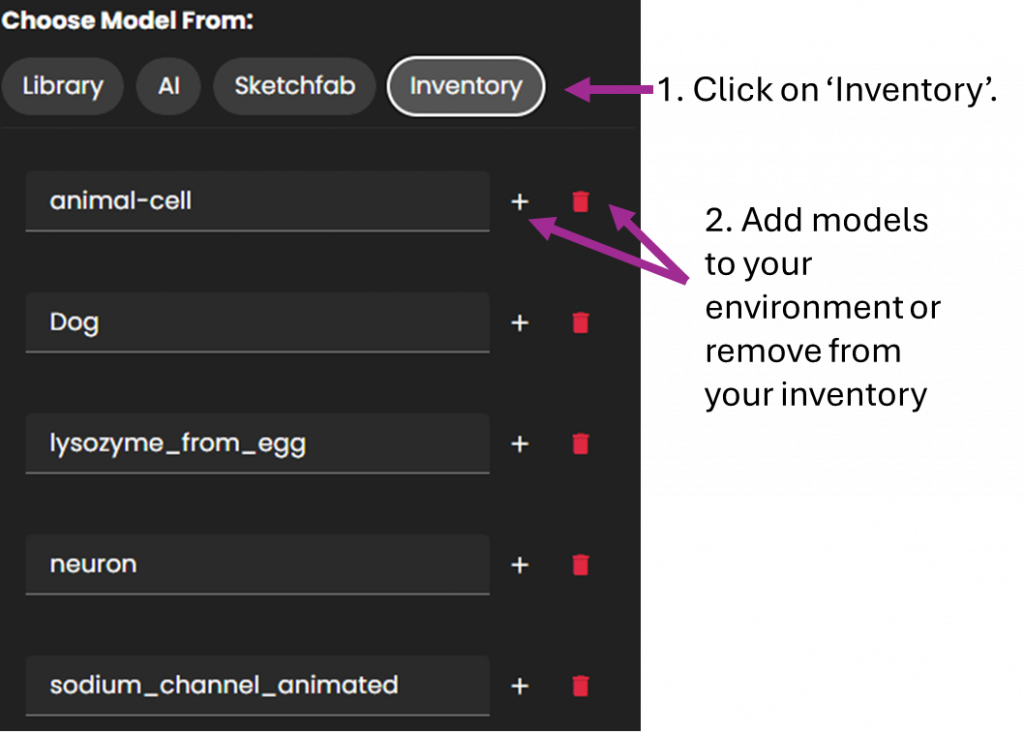
3D models can be uploaded directly into your environment, or you can store them in your ‘Inventory’ first and then upload them from there. The ‘Inventory’ can be a quick and easy way of locating models you’re planning to use frequently.