VR Basics Guide
This guide is for everyone using the VR room – it covers what we think every user needs to know. We really hope you enjoy attending an event in the Frame VR platform. Frame is quite different from Adobe Connect, meaning that sessions are likely to be less formal and more interactive. You can move around to interact with various aspects of the room, create avatars, and chat with other attendees.
Using any platform for the first time can take a little time to get used to, but Frame also has considerable guidance online if you need further help (see support.framevr.io).
Page shortcut (i.e., links to items on this page):
- Accessing the VR room
- Changing your avatar
- Changing your view
- Moving around
- The taskbar
- Viewing documents
- Answering polls
- Drawing on the whiteboard
Accessing the VR room
You will be provided with a link in order to join the VR room – please only use this link on the day and time of your event, otherwise you could end up gatecrashing another event! You can join on any internet enabled device, however we recommend you use a laptop or desktop computer (as tablets and phones have limited screen space).
When you click on the Frame link your web browser will open and you will be presented with a pop-up box. Here you can: choose your name, set up an avatar and adjust your camera and microphone settings. It is helpful to check your microphone and camera settings and set your nametag at this stage. Your name will be displayed above your avatar. You do not need to use your real name – if you want to be anonymous or have an alter-ego you can!
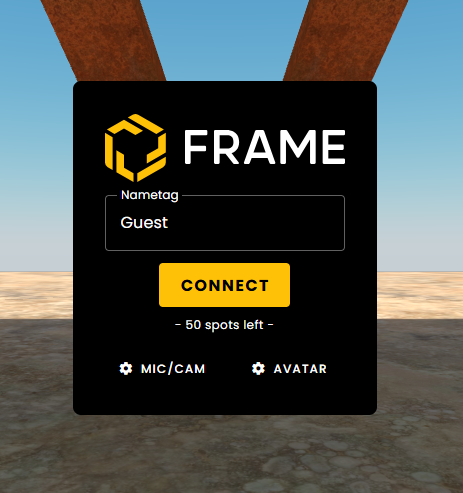
You can set your avatar at this point, but you can also do that once you are in the room. Instructions to set the avatar once you are in the room are given below.
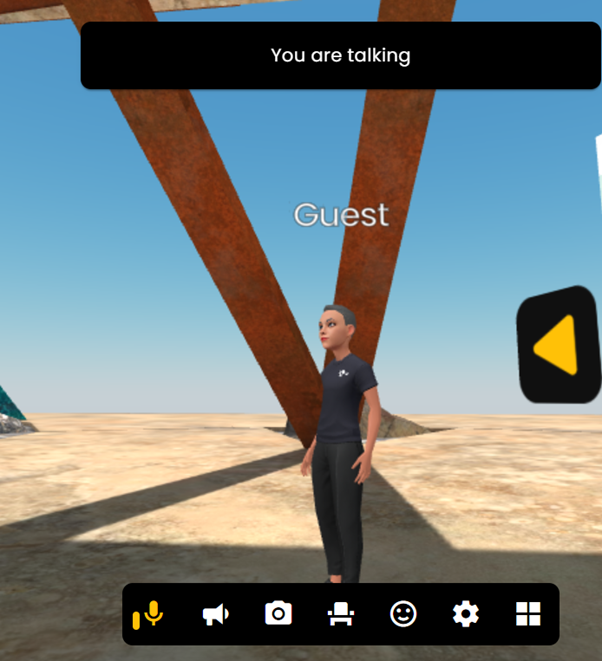
Once you click “Connect” you will enter the room. When you enter the room, assuming you have given permission via your web browser, you will enter the room with your microphone on. When your microphone is “live” it will be yellow on the taskbar, and when you speak you will see a banner in the room indicating that you are speaking. Clicking on the microphone icon will turn it off, it will appear red on the taskbar with a line through it.
Changing your avatar
How you appear in VR can be a fun and interesting aspect of hosting an event in Frame. You can use either an Android or Human avatar type, which you can generate in Frame. By default, you will enter the VR room as an Android.
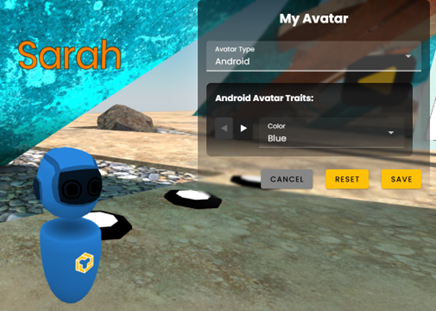
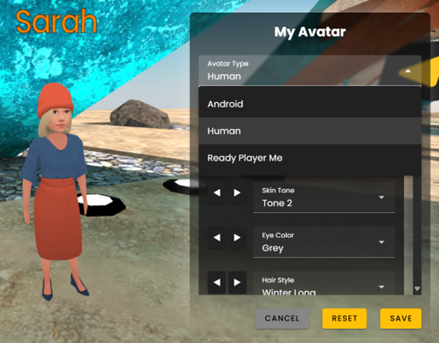
Once you’re in the VR room you can change your avatar by pressing ‘C’ on your keyboard. If you signed in you can change your avatar by opening the menu (top right of the screen), clicking on ‘Profile’, then ‘Customise Avatar’. You will then be able to choose an Android or Human avatar. Once you’ve chosen, you can change your android’s colour, or many aspects of the human’s appearance.
Changing your view
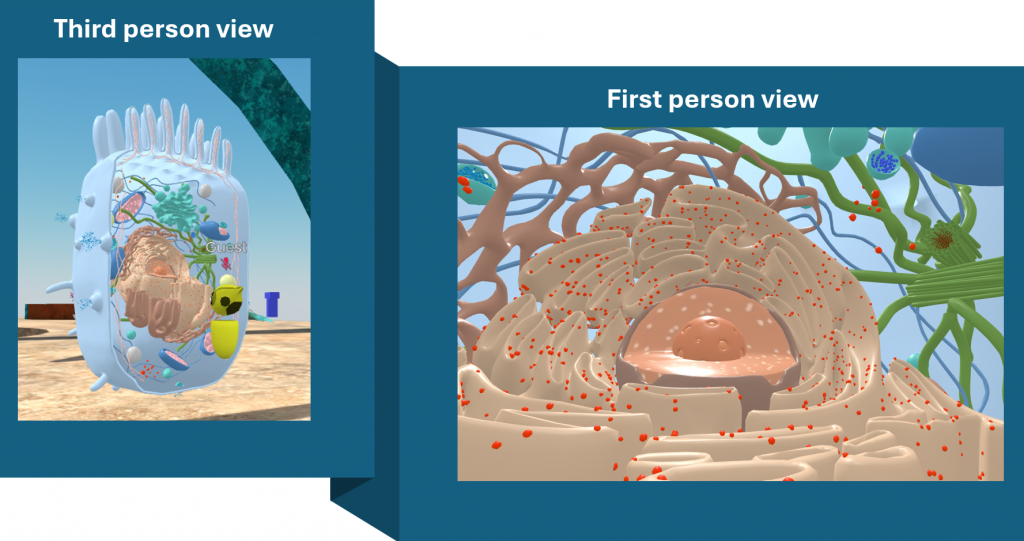
When you’re in the VR room you can press the ‘V’ key to switch between the the ‘third-person view’ (i.e., you see your avatar in VR space from the perspective of another person) and the ‘first-person view’ (i.e., you see the VR space from the perspective of being your avatar).
Moving around
Depending on the device you are using to access Frame, you can move around using your keyboard, mouse or a touch interface.
Keyboard
If you have a keyboard, the easiest way to move around is either using your arrow keys (i.e., left, right , up and down) or, on a QWERTY keyboard, the WASDQE keys.
- W – move forwards
- S – move backwards
- A – turn left
- D – turn right
- Q – step left
- E – step right
You can go faster by pressing the ‘SHIFT‘ key. If enabled, you can fly and walk through walls by pressing ‘F‘.
Mouse
To look around you can click and drag with your mouse. Using the scroll wheel will zoom in and out of your view point in the environment.
Touch
On a device with a touch interface (i.e., a tablet or phone), use the blue dot on your screen to move and swipe to look around.
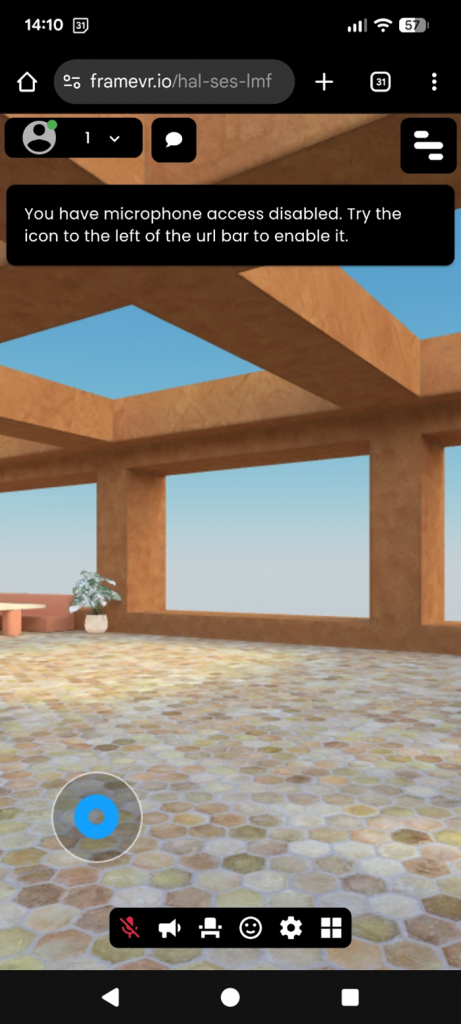
You can also double click on the floor (using your mouse or on a mobile) to create a blue dot – your avatar then proceeds to that point.
If you want to go to a particular person, click on the “People” menu, top left of your screen, select the person you want to move to, and click on the bent arrow – you will then teleport to them.
The taskbar
Once you’re in the room you should see a black taskbar at the bottom of your screen. This includes options such as microphone, megaphone, webcam, seat, emojis, settings and flat mode.
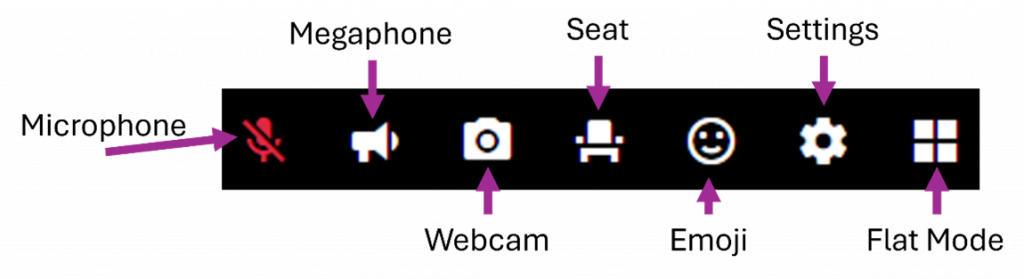
Microphone: Turns your microphone on and off. You may find that you need to adjust your browser settings to allow FrameVR to access the microphone.
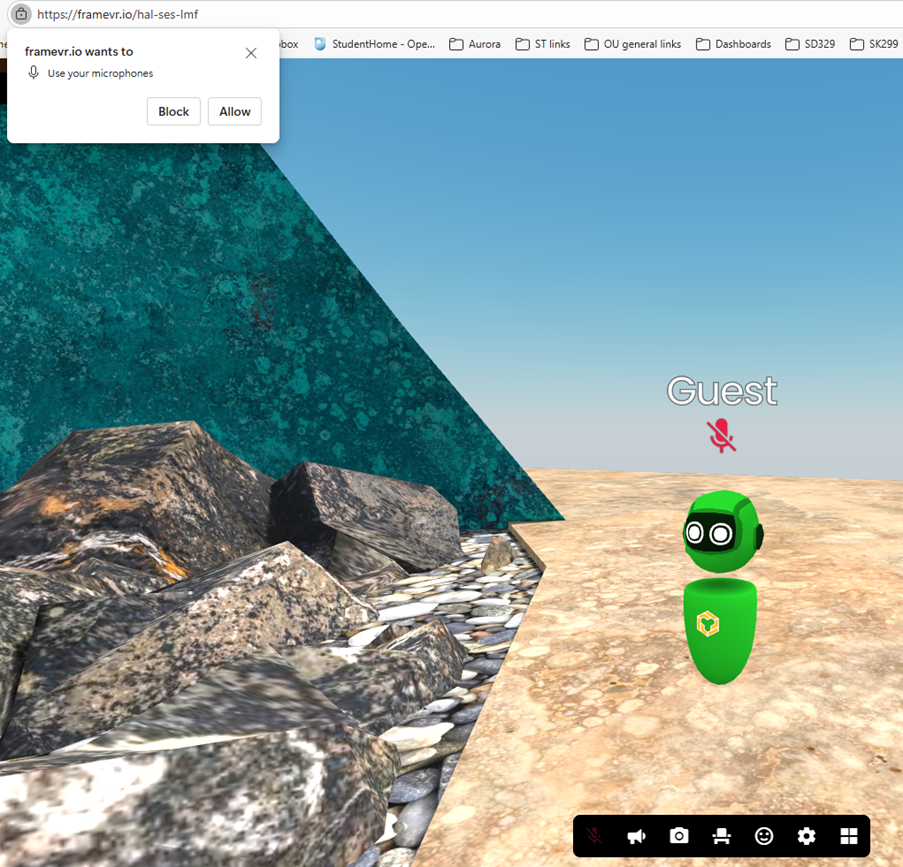
Megaphone: Some rooms have spatial audio, this means that you can hear the people who are nearest to you, but people further away will sound quieter or even be inaudible. Use of the megaphone enables you to broadcast to the entire room regardless of size. This is helpful if you have been asked to answer a question, but perhaps less useful if you’re discussing your avatar’s hairstyle.
Webcam: This turns on your webcam, which will open a screen near the head of your avatar (you can see what your webcam is sharing in a small screen at bottom left of your browser). Depending on your browser settings you may not have a webcam option.
Seat: Clicking “seat” lets your avatar sit down and you will sit in the nearest available chair. This is useful if you’re in a lecture theatre type environment, but if you’re not near a chair you may find you end up somewhere quite different to where you started. If the room you’re in doesn’t have chairs, you won’t go anywhere / do anything.
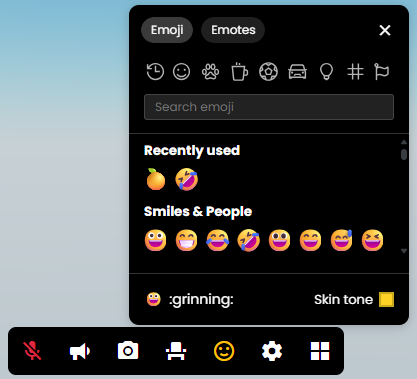
Emojis: Are a fun addition to FrameVR that can be useful for interaction. These are available from the Emoji icon on your taskbar.
There are a range of emojis possible that will appear when you click on them:
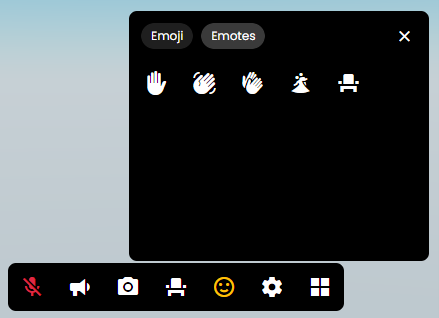
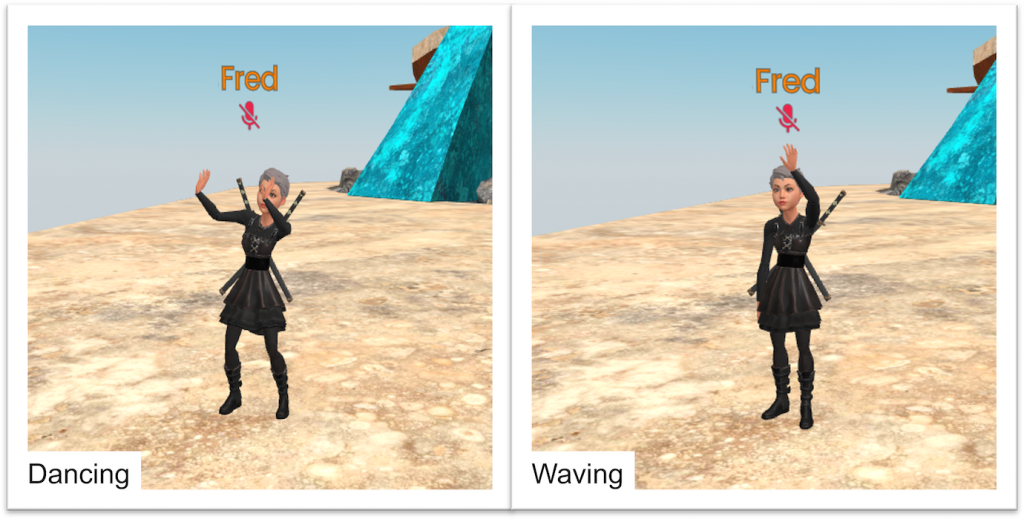
Emotes: If you have a human avatar, Emotes will allow you some additional movement (i.e. hand-up, waving, clapping, dancing or being seated). Once you’re in the room, give these a try!
Dancing and waving are shown in the images below:
Effects will appear throughout the room, for example ballons and blossom falling and disappearing, and LOLs!
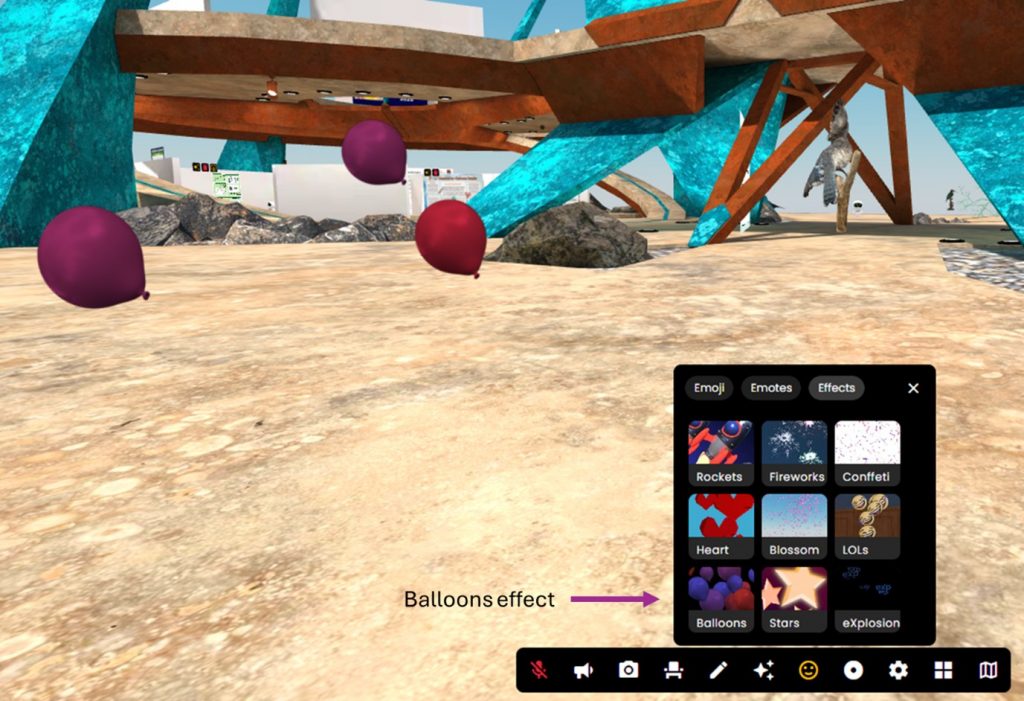
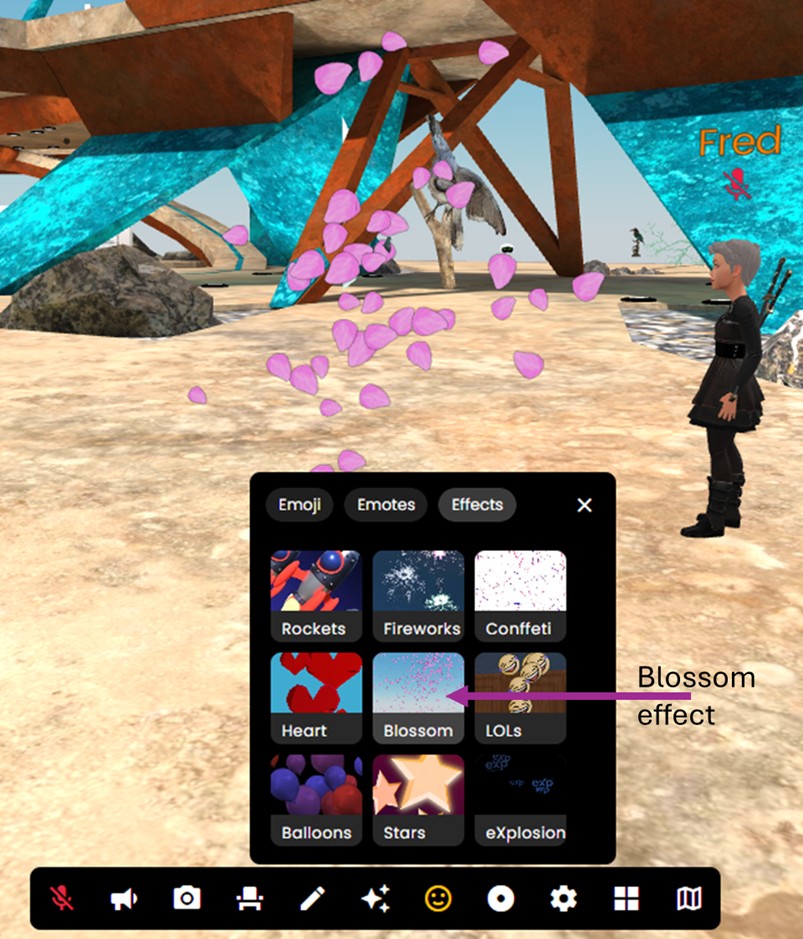
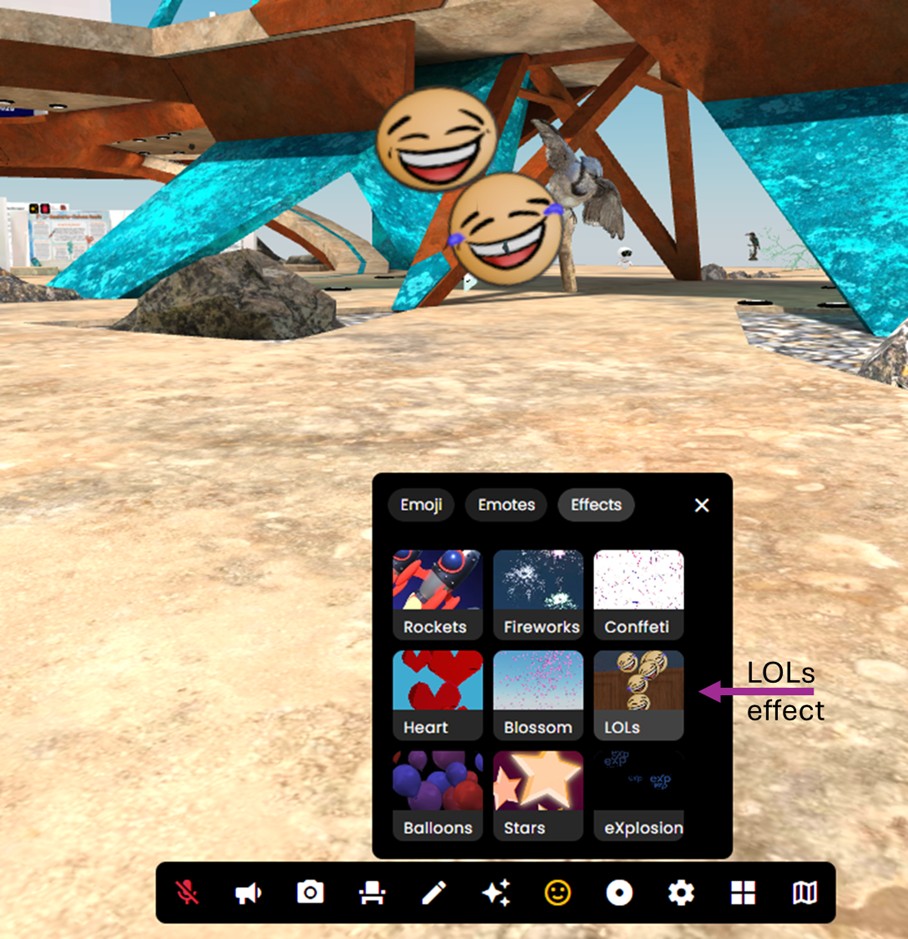
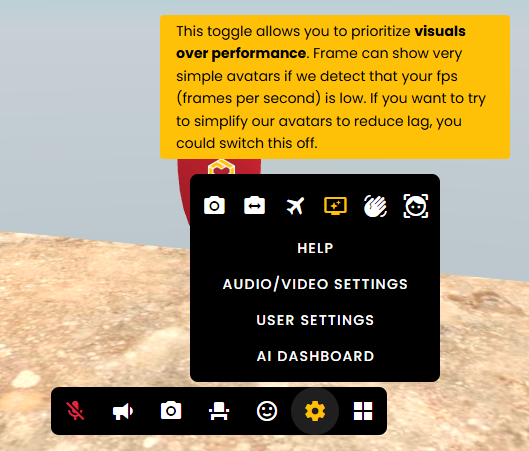
Settings: This contains a number of different options, some of which are duplicated elsewhere. Of note is the ability to prioritise “visuals over performance”. If you are struggling with lag or other performance issues, it is worth toggling this off to see if this improves your experience.
Viewing documents
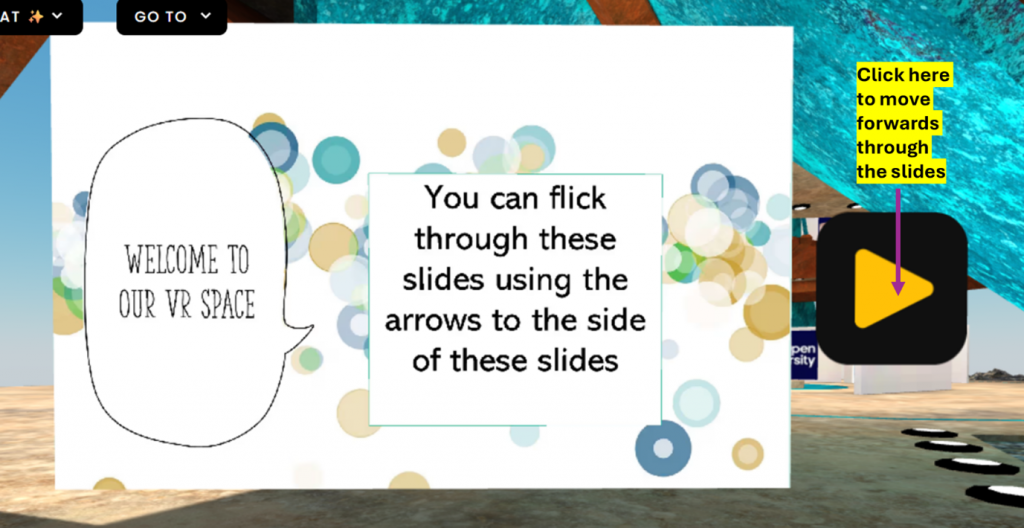
Documents (e.g., pdf files) can be viewed like posters. If the document has multiple pages, arrows will be shown as in the figure below. Clicking on the arrows will change the pages for everyone in the room, so be mindful if lots of you are reading at once!
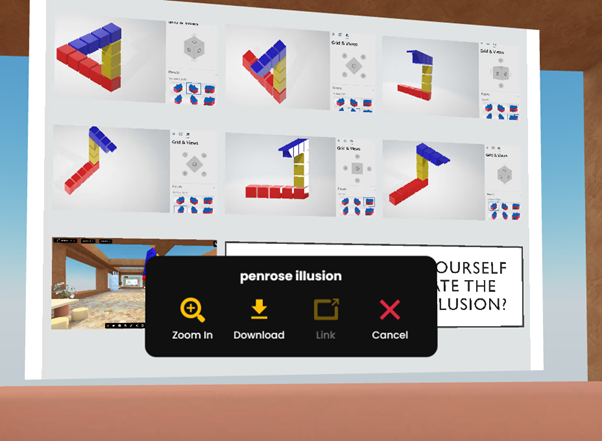
Clicking on the document will bring up additional options to make it full screen for you (“Zoom in”) or, if the options have been enabled, to download the document or access the link. If the options are dimmer (as in the “Link” option in the figure below) then that aspect has not been enabled by the room host.
Answering polls
When the room host adds a poll to the room, it will pop up in front of you. You can either answer it, or click “Cancel”. If the poll has been added prior to you joining the room, you can click on the poll to answer it. You can only answer once – if you click again you will be told that your answer has already been submitted. Depending on the settings, you may be able to see the results of the poll as a pie chart.
Drawing on the whiteboard
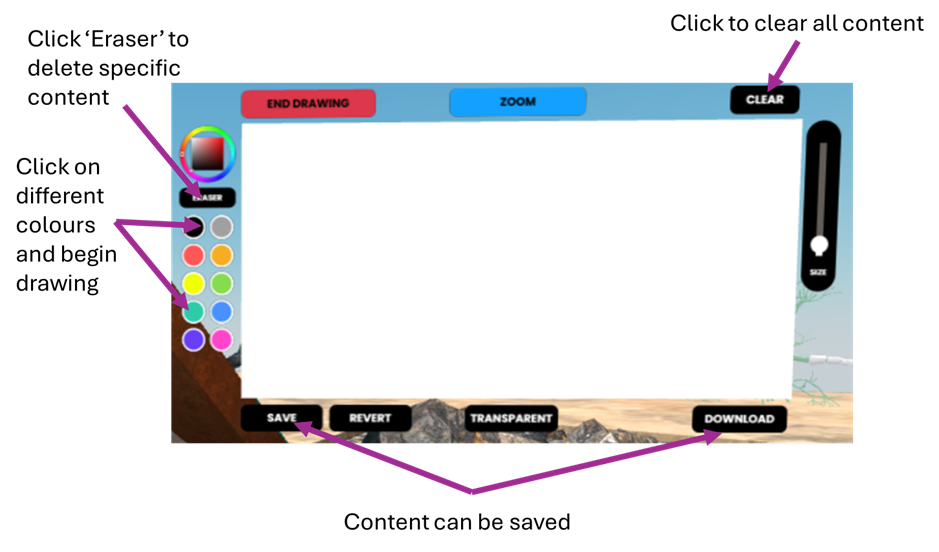
Whiteboards are an easy way to invite people to interact as everyone can write or draw on a whiteboard. Click on the “Start Drawing” button to get started. If you find the screen too small, clicking on “Zoom” button to make the whiteboard full sized for you.
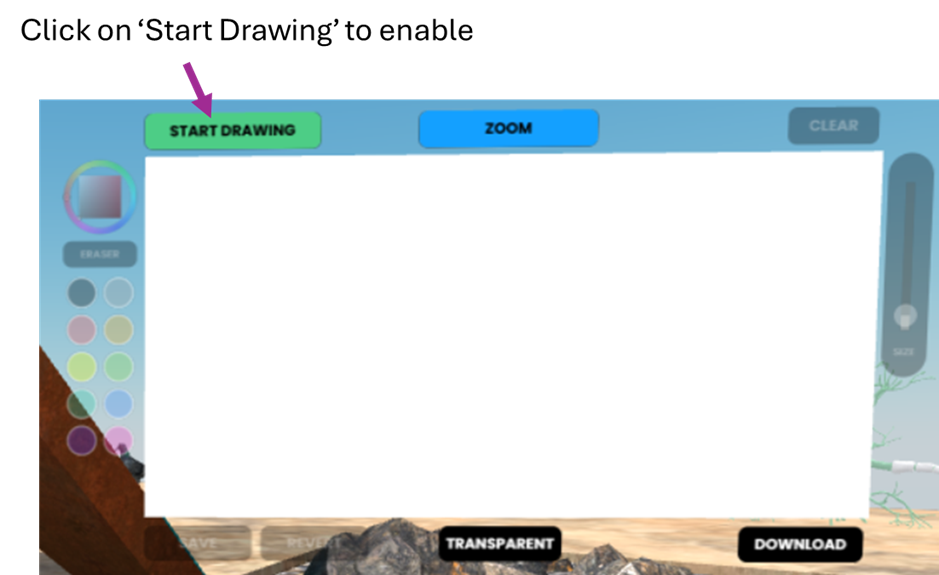
When you click on the “Start Drawing” button, the menu of colours on the left-hand side of the whiteboard will become active and clearer. You can then click on a colour and start drawing on the screen using your mouse, touchpad or touchscreen. Clicking “clear” will clear the whiteboard for everyone.
Note: When you enter the room, the whiteboard will be blank for you – regardless of what content may have been added prior to your joining the room.
Other features of the whiteboard are shown below.